Understanding the Different Types of Water Heaters
In today’s market, homeowners and builders can choose from various types of water heaters, each catering to different requirements and preferences. The primary types include tankless, storage tank, and heat pump water heaters. Understanding these options is essential when selecting the most suitable system for your household.
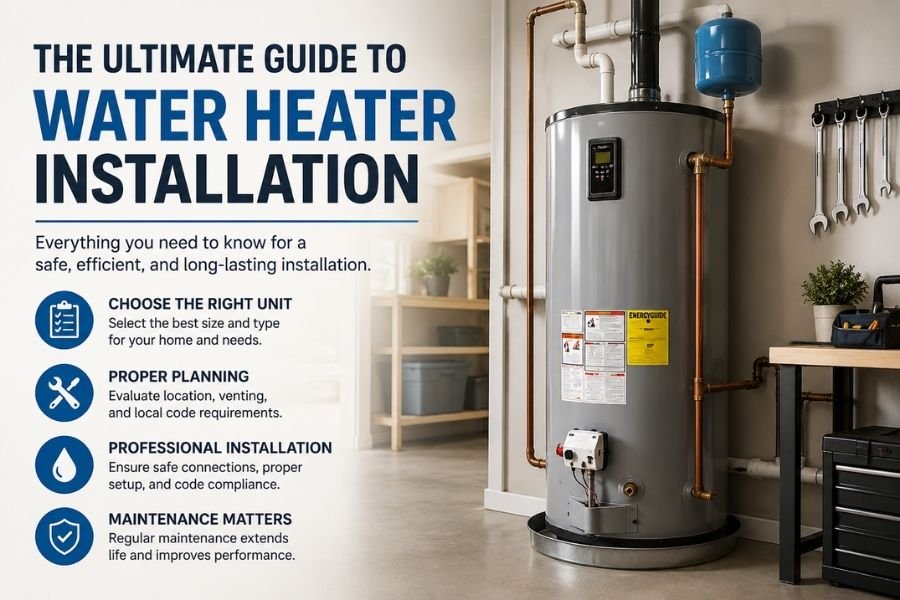
Storage Tank Water Heaters are the most traditional and widely used systems. They operate by heating a reservoir of water, usually between 20 to 80 gallons, and maintaining the desired temperature. While they are simple and cost-effective, these units can be less energy-efficient due to the heat loss that occurs during standby periods. Ideal for larger households with a higher demand for hot water, they ensure instant access but can result in higher energy bills over time.
Tankless Water Heaters, also known as on-demand water heaters, heat water directly without the need for a storage tank. These units provide hot water only when required, leading to significant energy savings. They are compact and can be installed in smaller spaces, making them suitable for contemporary homes. However, their initial costs are higher, and they might struggle to supply simultaneous hot water for multiple outlets, requiring multiple units in larger homes.
Heat Pump Water Heaters utilize electricity to move heat from the air or ground to heat the water. They are highly energy-efficient, often saving homeowners considerable amounts on their energy bills. These units work best in moderate climates and require adequate space for installation. While the upfront investment is substantial, the long-term savings on energy make them an attractive option for eco-conscious consumers.
Each water heater type has its unique set of advantages and disadvantages. Understanding the differences can assist in making an informed decision that aligns with both immediate needs and long-term energy goals.
Preparing for Water Heater Installation
Before embarking on the installation of a water heater, it is essential to conduct a thorough assessment of your existing plumbing and electrical systems. Evaluating the current infrastructure will help determine whether renovations or upgrades will be necessary to accommodate the new unit effectively. In many cases, positioning the new water heater conveniently near the existing plumbing line can significantly reduce installation time and costs.
Next, obtaining the necessary permits is a critical step in the preparation process. Depending on your local building codes and regulations, a permit may be mandatory to install a water heater. Consulting with your municipality about any requirements will ensure that your installation adheres to legal standards, ultimately safeguarding the integrity of your home and preventing potential fines.
Space measurement is another crucial aspect to consider. Accurately measuring the area designated for the water heater helps in selecting the appropriate size and capacity for your needs. It is advisable to account for additional space for maintenance activities and ensure there is sufficient clearance for installation. Taking these measurements will aid in the selection of a unit that not only fits well in the designated area but also meets your hot water demands effectively.
Safety precautions should always be a priority during installation. Make sure to turn off the electricity and water supply before beginning any work. Utilizing the right tools, such as wrenches, screwdrivers, and a level, is vital to facilitate a smooth installation process. Additionally, it is essential to consider the local climate and the specific requirements for the water heater’s installation, which may require particular attention to drainage and ventilation needs.
Step-by-Step Installation Process
Installing a water heater is a task that requires careful planning and execution to ensure efficiency and safety. Begin by turning off the power supply to the existing unit, typically by flipping the circuit breaker. Next, shut off the water supply and drain the old heater completely. To do this, attach a garden hose to the drain valve at the bottom of the tank and direct the flow to a suitable drainage area.
Once drained, disconnect the plumbing lines and electrical connections from the old water heater. It is essential to take notes or photographs of the setup for reference during installation. For gas units, ensure that the gas supply is also turned off before disconnection. At this point, remove the old heater from its location. Be careful when lifting, as these appliances can weigh significantly.
Prepare the area for the new water heater by ensuring the base is level and ready to support the weight of the new unit. Position the new heater and connect the plumbing lines to the respective outlets: cold water supply and hot water outlet. Tighten these connections, taking care to avoid over-tightening, which can cause damage.
If applicable, reattach the electrical wires according to local codes and guidelines. It is advisable to consult a licensed electrician for assistance to prevent any electrical hazards. Alternatively, if the water heater is gas-powered, connect the gas line securely and check for leaks using a soap solution—any bubbling indicates a gas leak that must be addressed.
After setting up the connections, refill the tank with water while maintaining an eye on leaks. Once fully filled, restore the power supply or gas supply. Finally, test the system by checking the temperature, pressure relief valve, and observing for any leaks around the connections. Always follow up your installation with regular maintenance checks to ensure longevity and optimal performance of your water heater.
Post-Installation Tips and Maintenance
Once the water heater installation has been successfully completed, it is essential to follow certain post-installation tips to ensure longevity and optimal performance. One of the first tasks you should address is the pressure relief valve. This component is crucial for regulating pressure buildup within the tank, which can prevent potential leaks or bursts. To check its functionality, lift the lever on the valve; water should flow out easily, indicating it operates correctly. If there is no discharge, or if it is leaking, replacement may be required.
Setting the thermostat at the recommended temperature is another important step after installation. Most manufacturers suggest a temperature of 120 degrees Fahrenheit, as this helps to minimize energy costs and reduces the risk of scalding. Adjusting the temperature can be done via the controls located on the unit; be sure to consult the user manual for manufacturer-specific instructions.
Periodic flushing of the tank to remove sediment buildup is critical for maintaining the water heater’s efficiency. Experts recommend flushing the tank at least once a year. This process involves turning off the power and cold water supply to the heater, attaching a garden hose to the drain valve, and letting the tank drain completely. Afterward, refill it and turn the water back on. Monitoring for signs of issues, such as unusual noises, discolored water, or fluctuating temperatures, is also advisable as these may indicate underlying problems.
In addition to these tasks, routine maintenance checks should not be overlooked. Consider scheduling professional servicing every few years to ensure all components are functioning as intended. This will extend the life of your water heater and avoid costly repairs down the line. By implementing these post-installation tips and maintenance practices, you can enjoy a well-functioning water heater for years to come.
Contact:
Salmark HVAC
630-796-1272
salmarkhvac@gmail.com
Lemont, IL





3 Responses